Placeholder Content Image

Police share wild seatbelt pic after fining driver for bizarre DIY fix

<p>A driver has copped a $387 fine over their bizarre seatbelt fix during a random stationary test at Richmond in Sydney's northwest. </p> <p>A photo shared by NSW Police Traffic and Highway Patrol showed the shocking state of the driver's seatbelt, which was tattered and held together by duct tape. </p> <p>The police department have warned other drivers to make sure their seatbelts are in good condition, otherwise they too might cop a fine and demerit points.</p> <p>"Seatbelts help to save lives, except for this one...."  they wrote in a Facebook post on Wednesday. </p> <p>"Hawkesbury Highway Patrol were recently conducting random stationary testing on Londonderry Road at Richmond when they spoke with a driver about his seatbelt.</p> <p> "Not only was the seatbelt not being worn, an inspection of the seatbelt found it to be dangerously defective," they added. </p> <p>"He was issued a defect notice and infringement in the amount of $387 and three demerit points. Please ensure your seatbelts don't look like this."</p> <p><img src="https://oversixtydev.blob.core.windows.net/media/2024/03/SeatbeltNSWPolice.jpg" alt="" width="1280" height="720" /></p> <p>Many commenters were baffled as to how the vehicle passed the eSafety check, also known as a pink slip inspection, which is required for vehicles over five years old in NSW to be deemed roadworthy. </p> <p>"And who passed the Pink Slip? That’s where I’d be heading,"  one wrote. </p> <p>"I wonder who did the rego check on this vehicle," another added. </p> <p>"How does it even get to that stage," a third questioned, while others agreed that the seatbelt was no longer safe. </p> <p><em>Images: Getty / Traffic and Highway Patrol Command, NSW Police Force</em></p>

Legal

Placeholder Content Image

Can’t afford a gym membership or fitness class? 3 things to include in a DIY exercise program

<p><em><a href="https://theconversation.com/profiles/lewis-ingram-1427671">Lewis Ingram</a>, <a href="https://theconversation.com/institutions/university-of-south-australia-1180">University of South Australia</a>; <a href="https://theconversation.com/profiles/hunter-bennett-1053061">Hunter Bennett</a>, <a href="https://theconversation.com/institutions/university-of-south-australia-1180">University of South Australia</a>, and <a href="https://theconversation.com/profiles/saravana-kumar-181105">Saravana Kumar</a>, <a href="https://theconversation.com/institutions/university-of-south-australia-1180">University of South Australia</a></em></p> <p>With the rising cost of living, gyms memberships and fitness classes are becoming increasingly unaffordable. But the good news is you can make <a href="https://pubmed.ncbi.nlm.nih.gov/28655559/">just as much progress at home</a>.</p> <p>Cardiovascular endurance, muscle strength and flexibility are the <a href="https://www.acsm.org/docs/default-source/publications-files/acsms-exercise-testing-prescription.pdf?sfvrsn=111e9306_4">most important</a> components of fitness. And each can be trained with little or no equipment. Let’s look at why – and how – to fit them into your DIY exercise program.</p> <h2>1. Cardiovascular endurance</h2> <p>Cardiovascular endurance exercise (or “cardio”) forces the heart and lungs to increase the supply of oxygen to the working muscles. Heart disease is a <a href="https://www.who.int/news-room/fact-sheets/detail/the-top-10-causes-of-death">leading cause of death</a> and cardiovascular endurance exercise helps keep the heart healthy.</p> <p>The best thing about cardio is you don’t need any fancy equipment to do it. Walking, jogging and running are great options, as are cycling, skipping rope and swimming.</p> <p>There are two approaches to maximise cardiovascular endurance:</p> <ul> <li> <p><a href="https://pubmed.ncbi.nlm.nih.gov/8897392/">high-intensity interval training</a> (HIIT) – short bouts of hard exercise (around 80% to 95% of your maximum heart rate) interspersed with lower intensity recovery periods (around 40% to 50% of your maximum heart rate)</p> </li> <li> <p><a href="http://pubmed.ncbi.nlm.nih.gov/26664271/">low-intensity steady-state</a> (LISS) exercise – aerobic activity performed continuously at a low-to-moderate intensity (around 50% to 65% of your maximum heart rate) for an extended duration.</p> </li> </ul> <p>Both are great options. While high-intensity interval training can be more time efficient, low-intensity steady-state training might be more enjoyable and easier to sustain long-term.</p> <p>No matter what you choose, <a href="https://www.who.int/news-room/fact-sheets/detail/physical-activity">aim for</a> a minimum of 150 minutes of moderate-intensity or 75 minutes of vigorous-intensity cardiovascular exercise each week. For example, you could try 30 minutes, five days per week of low intensity cardio, or 25 minutes, three days per week of high-intensity activity, or a combination of the two.</p> <p>How do you know if you’re exercising at the right intensity?</p> <p>Smart watches that measure heart rate can help to monitor intensity. Or you can rely on the good old-fashioned <a href="https://pubmed.ncbi.nlm.nih.gov/25536539/">talk test</a>. During low-intensity activity, you should be able to speak in full sentences. Conversely, short phrases (initially) or single words (towards the end) should be all that’s manageable during high-intensity exercise.</p> <h2>2. Muscle strength</h2> <p>Next is muscle strength, which we train through resistance exercise. This is important for bone health, balance and metabolic health, especially as we age and our <a href="https://pubmed.ncbi.nlm.nih.gov/30276173/">muscle mass and strength declines</a>.</p> <p>Aim for two days per week of whole-body resistance exercise performed at a moderate or <a href="https://www.who.int/news-room/fact-sheets/detail/physical-activity">greater intensity</a>. Try to build two weekly sessions that target the major muscle groups. This could include:</p> <ul> <li>squats – lower to the ground from standing by bending the hips, knees, and ankles while keeping the chest up tall before returning to standing by straightening the hips, knees and ankles</li> </ul> <ul> <li> <p><a href="https://www.physio-pedia.com/Hip_Hinge">hinges</a> – fold forward at the hips by pushing your bottom back to the wall behind you, keeping your back straight. A slight bend in the knees is fine but aim to keep your shins vertical</p> </li> <li> <p><a href="https://www.ncbi.nlm.nih.gov/pmc/articles/PMC7196742/">push-ups</a> – if a full push-up is too difficult, you can place your hands on a raised surface such as a step or a chair</p> </li> <li> <p>horizontal and vertical pull ups – using something like a portable chin up bar, which you can buy from sports supply stores</p> </li> <li> <p>vertical pushes – pushing an object (or weight) vertically from the top of your chest to an overhead position.</p> </li> </ul> <p>Once you have selected your exercises, <a href="https://pubmed.ncbi.nlm.nih.gov/35873210/">perform</a> 2–3 sets of 8–12 repetitions at a moderate to greater intensity, with about 90 seconds rest between each set.</p> <p>As you progress, continue to challenge your muscles by adding an extra set to each exercise, or including dumbbells, changing body position or wearing a backpack with weights. The goal should be to progress slightly each session.</p> <p>However, if you have any underlying health conditions, disabilities, or are unsure how best to do this, see an exercise physiologist or physiotherapist.</p> <h2>3. Flexibility</h2> <p>Improved flexibility can <a href="https://www.ncbi.nlm.nih.gov/pmc/articles/PMC3273886/">increase your range of motion</a> and improve your ability to manage daily life.</p> <p>While we don’t know the <a href="https://www.ncbi.nlm.nih.gov/pmc/articles/PMC3273886/">best means of increasing flexibility</a>, the most basic and readily accessible is static <a href="https://www.topendsports.com/testing/flex.htm">stretching</a>. Here, we lengthen the muscle – for example, the hamstrings, until we feel a “stretching” sensation. Hold that position for 15–30 seconds.</p> <p>While the precise intensity of this stretching sensation <a href="https://pubmed.ncbi.nlm.nih.gov/26347668/">remains elusive</a>, <a href="https://pubmed.ncbi.nlm.nih.gov/29506306/">around 5–10 minutes</a> per week per <a href="https://exrx.net/Lists/Directory">muscle group</a>, spread across five days, seems to provide the best results.</p> <h2>How to stick with it?</h2> <p>The best exercise is the one that gets done. So, whatever you choose, make sure you enjoy it. After all, it’s about creating an ongoing commitment to exercise that will deliver long-term health benefits.</p> <p>It’s also important to ensure you’re ready to exercise, especially if you have any underlying health issues, have been previously inactive, or are unsure how to start. A <a href="https://www.ausactive.org.au/apss">pre-exercise screening</a> can help you to determine whether you should see a doctor or allied health professional before starting an exercise program and for guidance on the next steps. <!-- Below is The Conversation's page counter tag. Please DO NOT REMOVE. --><img style="border: none !important; box-shadow: none !important; margin: 0 !important; max-height: 1px !important; max-width: 1px !important; min-height: 1px !important; min-width: 1px !important; opacity: 0 !important; outline: none !important; padding: 0 !important;" src="https://counter.theconversation.com/content/206204/count.gif?distributor=republish-lightbox-basic" alt="The Conversation" width="1" height="1" /><!-- End of code. If you don't see any code above, please get new code from the Advanced tab after you click the republish button. The page counter does not collect any personal data. More info: https://theconversation.com/republishing-guidelines --></p> <p><em><a href="https://theconversation.com/profiles/lewis-ingram-1427671">Lewis Ingram</a>, Lecturer in Physiotherapy, <a href="https://theconversation.com/institutions/university-of-south-australia-1180">University of South Australia</a>; <a href="https://theconversation.com/profiles/hunter-bennett-1053061">Hunter Bennett</a>, Lecturer in Exercise Science, <a href="https://theconversation.com/institutions/university-of-south-australia-1180">University of South Australia</a>, and <a href="https://theconversation.com/profiles/saravana-kumar-181105">Saravana Kumar</a>, Professor in Allied Health and Health Services Research, <a href="https://theconversation.com/institutions/university-of-south-australia-1180">University of South Australia</a></em></p> <p><em>Image credits: Getty Images</em></p> <p><em>This article is republished from <a href="https://theconversation.com">The Conversation</a> under a Creative Commons license. Read the <a href="https://theconversation.com/cant-afford-a-gym-membership-or-fitness-class-3-things-to-include-in-a-diy-exercise-program-206204">original article</a>.</em></p>

Body

Placeholder Content Image

$35,000 home comes with a catch

<p dir="ltr">Etsy is an online marketplace best known for its handmade trinkets and creative wares, but now, the site has decided to broaden its horizons and try its hand at selling houses too. </p> <p dir="ltr">A new listing from the ‘store’ Modular Home Direct is offering eager homeowners and passionate crafters the chance to own a 432-square-foot tiny house for just $35,306.09 ($22,896 USD). </p> <p dir="ltr">However, the property comes with a catch: its loving owner must construct it by themselves.</p> <p dir="ltr">The listing’s description declares it to be a “beautiful modern low cost home” that comes with “doors, windows, insulated wall panels, flooring, baseboard trims, drywall, insulated roof, plumbing and electrical hook ups”. Furniture, however, was not included.</p> <p dir="ltr">According to the American real-estate company Zillow, the home’s asking price of $22,896 USD is less than one tenth of the average cost of a home in the United States (~$346,270 USD).</p> <p dir="ltr">The flatpack property is manufactured by Modular Home Direct, the same company behind the listing, and features all the key necessities in a tiny home as well as a few bonuses - a bedroom, a bathroom, a kitchen, a living room, loft, and even front and rear porches.</p> <p dir="ltr">And for anyone looking to take on the challenge - though the offering is limited to the United States due to shipping logistics - there are a few things to consider. For as well as the base construction, the home will also require the installation of electricity and plumbing. </p> <p dir="ltr">According to the <em>Daily Mail</em>, the US-based property site Home Advisor has estimated that these costs would see potential owners forking out anywhere between $550 to $2,3000 USD on just the property’s electrical wiring, while plumbing could start at around $360 and could reach up to $2,000. </p> <p dir="ltr">Modular Home Direct aren’t the first to try and capitalise on the growing tiny house movement, as people all over the world seek alternative housing options as real estate prices continue to soar. </p> <p dir="ltr">And while some online weren’t thrilled with the idea, others were onboard, though most seemed to agree that the price was too good to be true, and likely would increase as more costs came to light.</p> <p dir="ltr">“The cost of materials in a house is much less than the ground it sits on,” a<em> Daily Mail </em>reader said. “By the time you buy the land, go through the permitting process, bring utilities in.. the cost gets closer to an established home.”</p> <p dir="ltr">“They have an interesting website, if you're handy it could be a diy project. My brother in law has a diy log cabin, family pitched in to build it, it's very nice,” one shared. “I think my husband and I could build this. We both know electrical and plumbing... only bump would be the heat pump”.</p> <p dir="ltr">“You have to buy the land, buy the house, put the house together (or pay someone to put it together), and pay someone to hook up the electricity and water. You'd probably have to pay for building permits and inspections,” someone said, before noting that “so once you've done all that, it would probably be easier just to buy a move-in ready house.”</p> <p dir="ltr">And as another wrote, “like everything else meant to be affordable, it will soon cost $109K when it catches on.”</p> <p dir="ltr"><em>Images: Etsy</em></p>

Real Estate

Placeholder Content Image

19 handy uses for toothpaste that have nothing to do with your teeth

<h2>Remove scuffs from shoes</h2> <p>A little toothpaste does an amazing job of removing scuffs from leather shoes. Just squirt a dab on the scuffed area and rub with a soft cloth. Wipe clean with a damp cloth. The leather will look like new.</p> <h2>Clean your piano keys</h2> <p>Has tickling the ivories left them a bit dingy? Clean them up with toothpaste and a toothbrush, then wipe them down with a damp cloth. Makes sense, since ivory is essentially elephant teeth. However, toothpaste will work just as well on modern pianos that usually have keys covered with plastic rather than real ivory.</p> <h2>Clean your sneakers</h2> <p>Want to clean and whiten the rubber part of your sneakers? Get out the non-gel toothpaste and an old toothbrush. After scrubbing, clean off the toothpaste with a damp cloth.</p> <h2>Clean your clothes iron</h2> <p>The mild abrasive in non-gel toothpaste is just the ticket for scrubbing the gunk off the bottom plate of your clothes iron. Apply the toothpaste to the cool iron, scrub with a rag, then rinse clean.</p> <h2>Polish a diamond ring</h2> <p>Put a little toothpaste on an old toothbrush and use it to make your diamond ring sparkle instead of your teeth. Clean off the residue with a damp cloth.</p> <h2>Deodorise baby bottles</h2> <p>Baby bottles inevitably pick up a sour-milk smell. Toothpaste will remove the odour in a jiffy. Just put some on your bottle brush and scrub away. Be sure to rinse thoroughly.</p> <h2>Prevent fogged goggles</h2> <p>Whether you are doing woodworking or going skiing or scuba diving, nothing is more frustrating (and sometimes dangerous) than fogged goggles. Prevent the problem by coating the goggles with toothpaste and then wiping them off.</p> <h2>Prevent bathroom mirrors from fogging</h2> <p>Ouch! You cut yourself shaving and it’s no wonder – you can’t see your face clearly in that fogged-up bathroom mirror. Next time, coat the mirror with non-gel toothpaste and wipe it off before you get in the shower. When you get out, the mirror won’t be fogged.</p> <h2>Shine bathroom and kitchen chrome</h2> <p>They make commercial cleaners with a very fine abrasive designed to shine up chrome, but if you don’t have any handy, the fine abrasive in non-gel toothpaste works just as well. Just smear on the toothpaste and polish with a soft, dry cloth.</p> <h2>Clean the bathroom sink</h2> <p>Non-gel toothpaste works as well as anything else to clean the bathroom sink. The tube’s sitting right there, so just squirt some in, scrub with a sponge, and rinse it out. Bonus: the toothpaste will kill any odours emanating from the drain trap.</p> <h2>Remove crayon from walls</h2> <p>Did crayon-toting kids get creative on your wall? Roll up your sleeves and grab a tube of non-gel toothpaste and a rag or – better yet – a scrub brush. Squirt the toothpaste on the wall and start scrubbing. The fine abrasive in the toothpaste will rub away the crayon every time. Rinse the wall with water.</p> <h2>Remove ink or lipstick stains from fabric</h2> <p>Oh no, a pen opened up in the pocket of your favourite shirt! This may or may not work, depending on the fabric and the ink, but it is certainly worth a try before consigning the shirt to the scrap bin. Put non-gel toothpaste on the stain and rub the fabric vigorously together. Rinse with water. Did some of the ink come out? Great! Repeat the process a few more times until you get rid of all the ink. The same process works for lipstick</p> <h2>Remove watermarks from furniture</h2> <p>You leave coasters around. But some people just won’t use them. To get rid of those telltale watermark rings left by sweating beverages, gently rub some non-gel toothpaste on the wood with a soft cloth. Then wipe it off with a damp cloth and let it dry before applying furniture polish.</p> <h2>Clear up pimples</h2> <p>Dab a bit of non-gel, non-whitening toothpaste on the offending spot, and it should be dried up by morning. The toothpaste dehydrates the pimple and absorbs the oil. This remedy works best on pimples that have come to a head. Caution: this remedy may be irritating to sensitive skin.</p> <h2>Clean smells from hands</h2> <p>The ingredients in toothpaste that deodorise your mouth will work on your hands as well. If you’ve gotten into something stinky, wash your hands with toothpaste, and they’ll smell great.</p> <h2>Stop bug bites from itching</h2> <p>Put toothpaste on your bug bite to keep it from itching. Dab a dime-sized amount onto your bug bite. This method also helps to cool down burns on your skin.</p> <h2>Remove a stain from the carpet</h2> <p>Rub toothpaste into the stain on the carpet with a toothbrush or sponge. Rinse with water and repeat until the stain comes up.</p> <h2>Clean your foggy headlights</h2> <p>Make the headlights on your car shine like new. Put toothpaste onto a sponge and scrub your headlight in circular motions. Wipe the toothpaste off with a damp cloth.</p> <h2>Remove small scratches from your phone screen</h2> <p>Rub toothpaste on the front or back of your phone (wherever there are scratches). The toothpaste will work to reduce the look of the scratches and make your phone screen look much better.</p> <p><em>Image credit: Shutterstock</em></p> <p><em>This article originally appeared on <a href="https://www.readersdigest.com.au/food-home-garden/diy-tips/19-handy-uses-for-toothpaste-that-have-nothing-to-do-with-your-teeth" target="_blank" rel="noopener">Reader's Digest</a>. </em></p>

Home Hints & Tips

Placeholder Content Image

Make your bedroom a place you’ll never want to leave

<p dir="ltr">Not all of us can pop into a local homeware store and score a $1,000 bed spread, but there are some little changes you can make to create the look of a super luxe bedroom.</p> <p dir="ltr" role="presentation"><strong>1. Pillows, pillows, pillows!</strong></p> <p dir="ltr">Plump, over-stuffed pillows are what you see at fancy hotels, so bring the same look home.</p> <p dir="ltr">Overstuff your decorative throw cushions to give them a more sophisticated look. Pile on more pillows with a colour scheme of your choice and transform your bed.</p> <p dir="ltr"><strong>2. Make a blanket statement</strong></p> <p dir="ltr">Luxury bedding isn’t attainable for all, so focus on a throw blanket instead. Choose a nice colour, one that suits your pillows and other decor and drape it off the end of your bed. It will take the focus off your duvet.</p> <p dir="ltr"><strong>3. Style your bed side table</strong></p> <p dir="ltr">Don’t let it evolve into a junk drawer! Empty your dining classes and clear things like hand creams and loose papers. To make the room more glamorous, get a new lamp, add in a plant and think about hanging something small in the empty wall space above the table.</p> <p dir="ltr"><strong>4. Upgrade your mirror</strong></p> <p dir="ltr">Try an antique-inspired brass mirror or one with an interesting shape to draw attention to it. There are also mirrors with a shelf attached, so you’ll gain a little vertical storage where you can place candles, indoor plants or whatever decor you fancy. </p> <p dir="ltr"><em>Image credit: Shutterstock</em></p>

Home Hints & Tips

Placeholder Content Image

Stop making these 5 living room mistakes

<p dir="ltr">A living room should be a welcoming place to entertain guests and a space where you can go to unwind.</p> <p dir="ltr">Creating a comfortable and stylish living room doesn’t have to involve any manual labour or cost a fortune, a few simple tweaks can make a world of difference.</p> <p dir="ltr" role="presentation"><strong>1. Furniture placement</strong></p> <p dir="ltr">If you tend to push furniture up against all the walls of your living room, you’re making it look smaller rather than larger.</p> <p dir="ltr">Give the room the illusion of more space by pulling furniture away from the walls. </p> <p dir="ltr">Plan your living room around the scale of the room, it will open it up and become a place you’ll never want to leave!</p> <p dir="ltr"><strong>2. Too much clutter</strong></p> <p dir="ltr">Clutter makes a house a home but storage is key when it comes to keeping a tidy living room.</p> <p dir="ltr">Pack away what you can to keep your tables relatively tidy. </p> <p dir="ltr">Arrange flowers, books, candles or house plants however you like to create an inviting atmosphere.</p> <p dir="ltr"><strong>3. TV placement</strong></p> <p dir="ltr">The optimal place for your TV to sit is on a blank wall that doesn’t block window light.</p> <p dir="ltr">If you can, mount your TV on the wall for a cleaner look, otherwise have an appropriately sized TV unit to put it on.</p> <p dir="ltr"><strong>4. Using the wrong rugs</strong></p> <p dir="ltr">Rugs are a must for a stylish living room but they need to look like they belong!</p> <p dir="ltr">Small rugs can imbalance the room, so go for a big rug your furniture can sit on top of.</p> <p dir="ltr"><strong>5. Lack of colour</strong></p> <p dir="ltr">Many living rooms lack colour, not just the walls, but the lack of artwork, rugs and cushions. </p> <p dir="ltr">Bright pieces add life to a room. Hang artwork, get colourful pillows, plants, or other clutter to spruce up the room - just not too much! </p> <p dir="ltr"><em>Image credit: Shutterstock</em></p>

Home & Garden

Placeholder Content Image

Creative ways to use leftover eggshells

<p dir="ltr">Eggshells are surprisingly versatile, so you may want to keep them around. There are various ways you can use the shells around your home and garden!</p> <h3 dir="ltr" role="presentation">1. Fertilise plants</h3> <p dir="ltr">There are plenty of natural sources you can use, like compost and manure, but you can also use eggshells! Crushed eggshells are a great source of calcium, which is needed for healthy plant growth. </p> <p dir="ltr">Rinse out the eggshells, let them dry, then crush them into small pieces and sprinkle them in the garden soil. They will break down over time, providing an excellent source of calcium for your plants.</p> <h3 dir="ltr">2. Feed the birds</h3> <p dir="ltr">Just like plants, and us, birds rely on calcium for strength, and if you’re a bird fan, then this is a sure way to keep them coming back. They’re a great addition to a bird’s diet, especially during nesting season.</p> <p dir="ltr">Rinse out the eggshells and let them dry, then crush them into small pieces and sprinkle them around the garden for birds to find. </p> <h3 dir="ltr">3. Make a scouring powder</h3> <p dir="ltr">You can use eggshells to make your own scouring powder to clean pots and pans. Rinse out the shells and let them dry, then crush or grind them.</p> <p dir="ltr">Mix the crushed eggshells with baking soda to create a natural powder strong enough to remove tough stains and grime.</p> <p dir="ltr">Don’t egg-nor the power of eggshells!</p> <p dir="ltr"><em>Image credit: Shutterstock</em></p>

Home & Garden

Placeholder Content Image

Creative ways to store more in your tiny bathroom

<p dir="ltr">Having a small bathroom doesn’t necessarily have to mean you don’t have enough space, you just have to think outside the box! Getting creative with storage can make the smallest of bathrooms look stylish. </p> <p dir="ltr" role="presentation"><strong>1. Towel racks</strong></p> <p dir="ltr">Using vertical space will help to clear out storage spaces built into your bathroom. Invest in a wall-mounted rack for towels, using bright-coloured towels can add a pop of colour to the room as well. </p> <p dir="ltr"><strong>2. Basket Shelves</strong></p> <p dir="ltr">Mount a set of baskets on your bathroom wall, you can keep cosmetics here or some candles and an indoor plant for decoration.</p> <p dir="ltr"><strong>3. Adhesive hooks</strong></p> <p dir="ltr">Make use of the space behind your bathroom door. Attach adhesive hooks to the inside of the door to store hair dryers, brushes and accessories.</p> <p dir="ltr"><strong>4. Roll-away cart</strong></p> <p dir="ltr">If you’ve got a really cluttered bathroom, use a wheeled cart to store your soaps, lotions, shampoo and conditioner. It saves a cluttered sink and you can roll it in and out for convenience.</p> <p dir="ltr"><strong>5. Dual purpose mirror</strong></p> <p dir="ltr">A two-in-one mirror can be a lifesaver for small spaces. Store your cosmetics, health care products and toothbrushes behind a stylish mirror. </p> <p dir="ltr">Don't think you can't have it all in a tiny space! With a creative mindset, you can fit all of your goodies into your bathroom. </p> <p dir="ltr"><em>Image credit: Shutterstock</em></p>

Home Hints & Tips

Placeholder Content Image

5 DIY ideas for your home that are easier than you think

<p dir="ltr">If you want to spruce up your home without breaking the bank, check out these home upgrades you can achieve all by yourself. </p> <p dir="ltr" role="presentation"><strong>1. Feature wall</strong></p> <p dir="ltr">If you’re looking for a pop of colour or have a wall in need of some TLC, try a feature wall. You can do this with paint, but if you want a wall that looks like it’s been renovated by professionals, try covering it with plywood panels. Arrange the plywood panels however you like on your wall and secure them with a nail gun, paint over the top of it and transform your room!</p> <p dir="ltr"><strong>2. Wall storage</strong></p> <p dir="ltr">Invest in some wooden hooks to hang items on. Use items such as scarves, indoor plants, hats and bags for decoration and paint the hooks for a pop of colour.</p> <p dir="ltr"><strong>3. Gallery wall</strong></p> <p dir="ltr">Dedicate a wall for paintings. It’s a good idea to pick artworks that are similar and will complement each other. Choose the same frame style so they all match, and line them up on the wall. </p> <p dir="ltr"><strong>4. Style your bathroom </strong></p> <p dir="ltr">It is possible to transform your bathroom even if you’re less than handy! Think of a colour scheme and get matching towels, soaps, and mats. You can also make other simple changes by matching towel rails, door knobs and taps to bring the room together.</p> <p dir="ltr"><strong>5. Paint your door</strong></p> <p dir="ltr">Totally transform your home with a new coat of paint on your front door. Bright colours make for a great feature and a stylish new front door will leave a lasting impression on guests. Use water-based gloss or semi-gloss paint for easy cleaning and durability. Paint your door in its frame or lay it on the floor and remember to remove knobs and hinges. </p> <p><span id="docs-internal-guid-0af3b014-7fff-0df3-6695-1c6d71e15a01"></span></p> <p dir="ltr"><em>Image credit: Shutterstock</em></p>

Home Hints & Tips

Placeholder Content Image

5 tips for gardeners

<p dir="ltr">When you first start gardening, do your research! Different plants require different maintenance, but here are some simple tips to help you get the garden of your dreams. </p> <p dir="ltr" role="presentation"><strong>1. Prune</strong></p> <p dir="ltr">Not sure when to prune? Prune spring-flowering shrubs like lilacs and large flowers such as climbing roses. Prune immediately after the blooms fade; if you prune summer plants in autumn or winter, you’re removing the flower buds for the next Spring.</p> <p dir="ltr"><strong>2. Growing season</strong></p> <p dir="ltr">Learn how long the growing season for your plant is, not all plants bloom in Spring! Do your research, and if you want to start small, start growing plants indoors to avoid overgrowing them.</p> <p dir="ltr"><strong>3. Pay attention to the light</strong></p> <p dir="ltr">Research how much light your plant needs. If you’re growing vegetables, get them into a spot where they will receive 8 hours of direct sunlight every day. </p> <p dir="ltr">Most veggies need full sun to produce the best harvest. </p> <p dir="ltr"><strong>4. Soil trumps fertiliser </strong></p> <p dir="ltr">Of course, fertilizer is a great tool for growing plants, but what you really need to pay attention to for optimal growth is quality soil. You can try organic fertilizers like compost and well-aged manure to your soil. The best soil structure is crumbly, easy to dig, happily receives water and is loose enough to provide oxygen for plant roots.</p> <p dir="ltr"><strong>5. Avoid digging or planting in wet soil</strong></p> <p dir="ltr"><span id="docs-internal-guid-4014128b-7fff-bc55-38d4-07cf1b45bfd7"></span></p> <p dir="ltr">Wait until the soil is crumbly and no longer forms a ball when you squeeze it in your hands. It doesn’t have to be bone dry, but just enough moisture to allow your plant to breathe and for you to plant them optimally.</p> <p dir="ltr"><em>Image credit: Getty</em></p>

Home & Garden

Placeholder Content Image

3 simple DIY tips to spruce up your home with money left over

<p dir="ltr">With the cost of living… need I say more? Well, with the “price of life” going up, everyone is looking for more affordable ways to spruce up their home. Here are some of the best tips for those looking to decorate with a little change left over.</p> <p dir="ltr" role="presentation"><strong>1. Decoupage an old table to personalise it</strong></p> <p dir="ltr">All you really need is a standard wooden table, some newspaper cutouts or patterns, and no matter the colour or stain - it will work.</p> <p dir="ltr">First, sand the table down and then apply the decoupage glue to the table and the back of the paper. From there, just stick the paper down in the desired pattern and smooth it down with something flat.</p> <p dir="ltr">About half an hour later, apply the glue directly onto the paper and maybe another layer once this has dried - that’s it!</p> <p dir="ltr" role="presentation"><strong>2. Upcycle your furniture with marble effect sheets</strong></p> <p dir="ltr">While marble bank accounts can hurt the wallet, up-cycling your furniture affordable to get that look is easy enough using self-adhesive plastic sheets</p> <p dir="ltr">Start by placing the sheet on the top of the table and tuck the ends underneath.</p> <p dir="ltr">Make sure you have a tight fit by using a credit card to flattest and then smooth the edges, and that’s it! Enjoy your stylish new table.</p> <p dir="ltr" role="presentation"><strong>3. Replace silicone around the house</strong></p> <p dir="ltr">The silicone around your shower and sink will deteriorate over time, sometimes so much so that it will get damaged or break off.</p> <p dir="ltr">Before playing a new layer on top, remove all the old silicone beforehand. Make sure to clear any residue that has been left behind and clean the area with denatured alcohol.</p> <p dir="ltr">Before applying the new seal, bring some tape and place it around the edges you want to reseal.</p> <p dir="ltr">Now, using sealant, slowly close the gap and smoothen the new finish with a caulking tool. </p> <p dir="ltr"><em>Image credit: Shutterstock</em></p>

Home & Garden

Placeholder Content Image

13 budget beauty tricks

<p>There are plenty of beauty tips that are not worth listening to. Who actually throws out their mascara after three months? Do you really need to buy enough make-up brushes to rival an artist's palette? And will putting strawberries all over your teeth really give you a smile to rival Lucille Ball’s? It’s all a bit too hard.</p> <p>Use these simple, DIY tricks to save your time, money and effort.</p> <ol> <li>To avoid lipstick on your teeth, after applying your lippie stick your finger in your mouth and pull it out. This way your finger will take the excess product, not your teeth. </li> <li>Concoct your own plumping lip venom (and save yourself $30) by adding a drop of cinnamon or peppermint oil to your lip colour.</li> <li>Vaseline costs you pocket change and has to be the most hard-working beauty products out there. Apply to lashes before bed to make them grow longer and thicker over time, use it to tame unruly eyebrows, apply to pulse points before spritzing your perfume to make the scent last longer, combine with sea salt to make a scrub and mix with lipstick to make a subtle cream blush.</li> <li>Don't have a curler? Give yourself groovy, long-lasting waves by flat-ironing your braids with your hair straightener. Avoid making the braids too tight lest you like the crimped look.</li> <li>Don't listen to Sally Hansen when she says you need to buy cuticle cream. Eye cream applied to your nail beds serves the same purpose.</li> <li>While towels cause static and friction, drying your hair with a cotton T-shirt eliminates the frizz factor completely.</li> <li>A light dusting of baby powder between coats of mascara creates fullness you have not dared to even dream of.</li> <li>There's nothing worse than blotches of dry shampoo that could be mistaken for dandruff. Always apply it the night before, not the morning of, to prevent product build-up.</li> <li>Want to give your lipstick long-wear power? After applying, hold a tissue over your lips and lightly dust with translucent powder to set the colour.</li> <li>Got a spot of foundation on your white shirt? A touch of shaving cream on a damp cloth should clear it right up.</li> <li>You can reduce hair static and fly-aways by slicking it with a dryer sheet.</li> <li>There's no tougher wait than the time it takes your conditioner to work or your manicure to dry. Cut that drying time in half by dunking your nails in a bowl of cold water for two minutes shortly after painting.</li> <li>Had a messy experience with leaky products in your suitcase? Hasn't everyone? Just unscrew the caps, place a layer of cling film over the top and screw them back to prevent any liquid from ruining your trip.</li> </ol> <p><em>Written by Kathleen Lee Joe. First appeared on <a href="http://Stuff.co.nz" target="_blank" rel="noopener">Stuff.co.nz.</a></em></p> <p><em>Image credits: Getty Images</em></p>

Beauty & Style

Placeholder Content Image

Seven simple ways to save money now!

<p>Could you do with a few extra dollars in your pocket each week? These handy hints make it all too easy.</p> <p>A few extra dollars in the kitty each week would be handy for any of us. It’s possible! It’s just a matter of finding ways to trim the fat on your expenses and stretch your dollar further. We’ve compiled some simple tricks to start today to get money in your pocket fast. They’re achievable for everyone!</p> <p><strong>Grow your own food</strong><br />Save at the supermarket by growing your own fruit and vegies. If you have a bit of extra space out in the backyard, why not utilise it with an apple tree, a few vegies and if you have the room, why not some chickens? For beginners, mint, silverbeet, leafy greens, zucchini and cherry tomatoes are great because they don’t need too much love and attention to grow.</p> <p>If you’d like to start out small, a lovely planter box against the kitchen windowsill to grow herbs could be a good starting point. Basil, oregano and parsley are all simple to start with and can all be grown indoors during winter. By growing your own food you’ll save on your weekly grocery bill and be engaging your mind and moving the body. <a href="http://littleveggiepatchco.com.au/" target="_blank" rel="noopener">The Little Veggie Patch Co</a> is a Melbourne-based business dedicated to helping people grow food. Their website offers some great videos on useful tips and tricks to help you grow a vegie patch in no time.</p> <p><strong>Shop online</strong><br />Not only could you bag yourself some great bargains that you might not be able to find in a store, you can also cut out impulse buying. This can save you a lot at the supermarket if you’re a shopper who loves to buy what’s on special. While you may think you’re saving money by doing this, you’re actually just buying items you may not have necessarily bought if you were buying your groceries online.</p> <p>Before buying any item online, whether it’s a new bed for your pet pooch or your grocery essentials for the week, make sure you understand the company’s shipping costs and policies. Many places offer free delivery or shipping when you buy their items but it’s best to check first.</p> <p><strong>Know your concessions</strong><br />If you’re on the pension, you could save on utility bills, travel expenses and many other every day costs. Many companies offer discounts for Aussies on the pension, which could put a few extra dollars in your pocket each week. However, you have to tell them. They won’t apply the discounts automatically. You could save money on books, magazines and travel.</p> <p>For those over 60, you can apply for a seniors’ card in your state or territory. This nifty little card offers a range of discounts, such as cruises or travel insurance, magazine subscriptions, cinema and event tickets, plus a lot more. The eligibility requirements and discounts differ between states, so it’s best to contact your local social services department to find out more.</p> <p><strong>Sign up for customer reward programs</strong><br />If you’re buying products from a particular store, you should be rewarded right? You can be, but you’ll need to sign up to a store’s loyalty or rewards program. Generally, these work by rewarding you with points each time you shop in a particular store, and then once you reach a certain amount, you get a reward. It could be a voucher, a special deal or a product.</p> <p><strong>Keep a money diary or download a budget app</strong><br />It’s hard to save without knowing where your money is going. Nip this in the bud by keeping a record of where your money goes in one week. Be disciplined and write down every expense. If you have a smartphone, iPhone, tablet or iPad, why not download a budget app? There are plenty out there in either the Apple Store or Google Play for those wanting to take control of their savings and take note of their spending habits.</p> <p><strong>Make your own gifts</strong><br />Do you spend a lot of money buying gifts for your kids and grandchildren? What about friends and colleagues? Birthdays, anniversaries, school achievements and other events you may buy gifts for can quickly add up to be a huge expense. To save money, why not put your skills to the test and make your own gifts?</p> <p>With so many material things in the world, being given a gift personally made by you could be a much nicer way of showing your affection for someone. Whether you’re great at painting or drawing, cross-stitching, making candles or baking, put your skills to the test by creating a gift that has more heart than anything you could possibly buy in a store.</p> <p><strong>Cut back for one month</strong><br />Why not try one month without something you regularly buy but don’t need. It could be a morning coffee or tea, a magazine you buy every fortnight or your weekly indulgence of potato crisps on a Saturday night. Whatever it is, try to give it up for one month.</p> <p>Put aside the money you would normally use to buy this item, and deposit it into a money box at home. While this isn’t going to buy you a round-the-world airplane ticket after one month, if you do this a few times a year, you’ll soon see results.</p> <p><em>Image: Getty Images</em></p>

Money & Banking

Placeholder Content Image

DIY: Planter box

<p>Whether you want to grow a herb garden or are looking for a nifty way to house a few flowering pots, planter boxes are a great way to present your greenery in a neat, space-saving and decorative manner. And the good news is, you can easily make a planter box yourself.</p> <p><strong>Supplies:</strong></p> <ul> <li>Cedar wood (at least 3mm thick)</li> <li>Jigsaw</li> <li>Galvanized screws</li> <li>Wood glue</li> <li>2 clamps</li> <li>Drill</li> <li>Primer</li> <li>Paint (colour of choice)</li> </ul> <p><strong>Instructions:</strong></p> <p>1. Depending on the space in which you want to place your planter box – be it a windowsill, table or wall outside, the best way to determine the length of your planter box is to match the width of the box to the width of the space you are making it for.</p> <p>2. With a jigsaw, cut three pieces of cedar approximately to the length and width you have measured. These pieces will form the base, front and back of your planter box. For the sides, cut two 20cm square pieces.

</p> <p>3. With the help of wood glue, assemble the planter box by fitting the pieces together in a rectangle shape. Use the clamps to hold together until dry.

</p> <p>4. Drill holes into the four corners and along the bottom of the front panel – making sure to drill right through to the bottom and side boards.

</p> <p>5. Insert the galvanized screws into the holes on the front, back and side boards.

</p> <p>6. Drill a few small holes into the bottom of your planter box to allow for adequate drainage which will help your plants to grow healthily.

</p> <p>7. To finish, apply a primer and either a wood stain or paint to the outside of the window box.</p> <p>Image: </p>

Home Hints & Tips

Placeholder Content Image

4 ways to dehumidify your home

<p dir="ltr">Normally welcomed in some parts of the country, the recent rain has brought an influx of another, spottier problem into our homes: mould.</p> <p dir="ltr">Reducing the humidity in the air is one of the best ways to keep mould at bay - which has seen dehumidifiers become a hot commodity and a rare find.</p> <p dir="ltr">But before you start on your quest to find one of those elusive devices, here are some simple DIY options you can try to stave off those pesky black spots.</p> <p dir="ltr"><strong>1. Silica gel packets</strong></p> <p dir="ltr">Instead of throwing away these tiny sachets in your packets of food, new electronics, or bottles of vitamins, keep them in a plastic container and poke some holes in the lid to create your own dehumidifier.</p> <p dir="ltr">The packets contain silicon dioxide in its gel form, which is made up of millions of tiny pores that can absorb and hold moisture.</p> <p dir="ltr">Place the container wherever it’s needed and be sure to keep it out of reach of kids and pets.</p> <p dir="ltr"><strong>2. Rock salt dehumidifier</strong></p> <p dir="ltr">Salt is another easy (and cheap) option for absorbing moisture - and all you’ll need to make your own rock salt dehumidifier is just two buckets and some salt.</p> <p dir="ltr">First, cut some holes in the first bucket and place it inside the second bucket. Then, fill the first bucket with salt and it’s ready to use - though you will need to empty the outer bucket as it fills up with liquid.</p> <p dir="ltr"><strong>3. Baking soda</strong></p> <p dir="ltr">Baking soda is just good for baking, and you can add dehumidifying to its list of handy uses.</p> <p dir="ltr">It works best in small spaces, like the tops of wardrobes or cupboards, and is as simple as filling a small bowl with baking soda and replacing it as needed.</p> <p dir="ltr"><strong>4. Plants</strong></p> <p dir="ltr">On top of adding some greenery to your spaces, certain kinds of plants can also reduce the amount of moisture in the air.</p> <p dir="ltr">Plants with waxy or hairy leaves, such as cacti, or those with large leaves are your best choice, with top picks including peace lilies, lilacs, spider plants, aloe vera, English ivy, air plants and Boston ferns.</p> <p><span id="docs-internal-guid-7c3b500f-7fff-93c2-8390-4a631b1f4e42"></span></p> <p dir="ltr"><em>Image: Getty Images</em></p>

Home Hints & Tips

Placeholder Content Image

One clever woman's lettuce hack

<p>A popular Aussie TikTok user has shared a genius hack for overcoming the east coast’s ongoing lettuce shortage.</p> <p>With the price of fruit and veg still very high due to recent flooding, inflation and supply chain issues, user permacultureouttapoverty posted an easy alternative to spending and that is, to grow your own.</p> <blockquote class="tiktok-embed" style="max-width: 605px; min-width: 325px;" cite="https://www.tiktok.com/@permacultureouttapoverty/video/7116415378762272002" data-video-id="7116415378762272002"> <section><a title="@permacultureouttapoverty" href="https://www.tiktok.com/@permacultureouttapoverty" target="_blank" rel="noopener">@permacultureouttapoverty</a> How to regrow a lettuce <a title="nswlettuceshortage" href="https://www.tiktok.com/tag/nswlettuceshortage" target="_blank" rel="noopener">#nswlettuceshortage</a> <a title="lettuceshortage" href="https://www.tiktok.com/tag/lettuceshortage" target="_blank" rel="noopener">#lettuceshortage</a> <a title="lettuce" href="https://www.tiktok.com/tag/lettuce" target="_blank" rel="noopener">#lettuce</a> <a title="foodshortage" href="https://www.tiktok.com/tag/foodshortage" target="_blank" rel="noopener">#foodshortage</a> <a title="food" href="https://www.tiktok.com/tag/food" target="_blank" rel="noopener">#food</a> <a title="regrow" href="https://www.tiktok.com/tag/regrow" target="_blank" rel="noopener">#regrow</a> <a title="propagation" href="https://www.tiktok.com/tag/propagation" target="_blank" rel="noopener">#propagation</a> <a title="regrowlettuce" href="https://www.tiktok.com/tag/regrowlettuce" target="_blank" rel="noopener">#regrowlettuce</a> <a title="regrowyourfood" href="https://www.tiktok.com/tag/regrowyourfood" target="_blank" rel="noopener">#regrowyourfood</a> <a title="regrowveggies" href="https://www.tiktok.com/tag/regrowveggies" target="_blank" rel="noopener">#regrowveggies</a> <a title="♬ original sound - Permaculture_outta_poverty" href="https://www.tiktok.com/music/original-sound-7116415381975517954" target="_blank" rel="noopener">♬ original sound - Permaculture_outta_poverty</a></section> </blockquote> <p>“Water propagation method, for people who don’t have access to soil or an outside garden space or [have] very little income to get started,” she wrote alongside the clip.</p> <p>However, the real struggle is finding a head of lettuce that has the roots attached with the young woman admitting she found hers 40km away from where she lives.</p> <p>Once she’d found it, the next steps were easy: She chopped the head off the cos lettuce, then put the roots and remaining bit of leaf in a jar of water.</p> <p>She then placed the jar of water on the window sill, removed the remaining leaves, and to ensure that only the roots were submerged, put a skewer through the top of the lettuce to stop it from falling into the water.</p> <p>I’ve already started to get some very small regrowth overnight, so [I’d] say a few days,” the woman wrote, asked how long it will take to grow a full head.</p> <p>“After I have my first regrowth, I’ll be planting it in soil.”</p> <p>The handy clip, which has been viewed 245,500 times, attracted hundreds of comments, with many users sharing their own experiences propagating vegetables.</p> <p><em>Images: TikTok</em></p>

Food & Wine

Placeholder Content Image

5 reasons why you have noisy water pipes and what you can do to fix them

<p> </p> <p class="MsoNormal">Michael Jackson once famously sang “It’s close to midnight, something evil’s lurking in the dark”. While you and I might never have to encounter the ghouls and zombies that Michael did in the Thriller video, in the everyday family home, unwanted household noises at midnight could rightfully be considered just as evil. </p> <p class="MsoNormal">Among the most unwanted in any family home are noisy water pipes. There are numerous reasons why the pipes in your home might be providing you with a cacophony of noisy clangs, clashes and clatters that are about as appreciated as a telemarketer’s call at dinner time. Here are five of the most common causes of noisy water pipes, and what you can do to fix them.</p> <p class="MsoNormal"><strong>Water Hammering</strong></p> <p class="MsoNormal">One of the most common causes of <a href="https://www.mremergency.com.au/" target="_blank" rel="noopener">noisy water pipes</a> in the home is what we call ‘water hammering’. We all know that when we turn the tap on, water comes out. Behind the scenes though (or more accurately, behind the wall and in the pipes), the energy created by turning on the tap that enables the water to flow with sufficient force and speed stops suddenly when we turn the tap off. And something needs to happen with that energy.</p> <p class="MsoNormal">The hot and cold taps each have pipes attached that contain air chambers. The water rush grinds to a halt when you turn off the tap, and the water travels to a vertical pipe where it hits an air cushion that absorbs the force of that water. The absorption of that force minimises any rattling or hammering of the pipes. However, over time and sustained usage, the air chamber in the vertical pipes can diminish, which reduces the ability of the system to neutralise the force of the water, leading to water hammering and noisy water pipes. </p> <p class="MsoNormal">This can be fixed though, simply by turning on all taps and drainage systems throughout your home while the primary water valve is switched off. Give it some time, then refill them with water. Doing this will force air into the risers and stop the water hammering, ensuring your pipes don’t wake you up at some ungodly hour. </p> <p class="MsoNormal"><strong>The ballcock assembly is worn out</strong></p> <p class="MsoNormal">If you flush your toilet and experience a heavy banging sound or noticeable rattle as the cistern finishes filling up, this will typically point to an issue with your ballcock assembly. The ballcock assembly is used to regulate the filling process of your toilet; when it wears out through repeated use, it will result in loud, unwanted noises. Fixing or replacing the ballcock assembly will fix this issue. </p> <p class="MsoNormal"><strong>Washers have worn out</strong></p> <p class="MsoNormal">If you’re hearing a squeaky or whistling sound coming from your water pipes, it is likely due to a washer in the tap or valve that has worn out with continued use over time. This happens. More often than not, in this instance you’ll find that the valves that are hooked up to the taps or the washing machine are the guilty party. Fixing this issue is relatively easy, especially if you’re only hearing the noise when you’re using a washer. All you need to do is close off the valve, check all the washers throughout your home, and replace any washers that have worn out or have cracked. Of course if the noise persists after you’ve inspected and replaced any washers, the issue may lie elsewhere. A call to a local emergency plumber may be necessary. Be sure to switch off the water while you wait for the plumber to arrive.</p> <p class="MsoNormal"><img src="https://oversixtydev.blob.core.windows.net/media/2022/06/plumbing-bend1.jpg" alt="" width="1280" height="720" /></p> <p class="MsoNormal"><strong>Loose piping</strong></p> <p class="MsoNormal">If the water pipes in your home are perhaps looser than they should be, that can certainly result in unwanted noises. Loose pipes can have a tendency to sway with large volumes of water moving through them, causing them to rattle and repeatedly hit walls or objects behind the walls. This contact causes the banging sounds you might hear, which can potentially result in damage to the pipes.</p> <p class="MsoNormal">Pinpointing the source of the problem is the all-important first step towards fixing loose pipes. You’ll likely need to get underneath the house with a powerful torch and have someone else in the house flush the loo or turn on a tap. Now you’ll need to be particularly attentive, with your powers of observation turned up to the max, while you try and determine exactly where the problem lies. Once you have located ‘ground zero’, you can secure the pipes to reduce movement and minimise noise. </p> <p class="MsoNormal"><strong>The main shut off valve may be damaged</strong></p> <p class="MsoNormal">The plumbing system in your home will generally have either a primary shut off valve or a water pressure regulator. If either of these are faulty or have sustained damage, this can lead to your water pipes squealing like an unhappy toddler. And you’ll likely hear it all throughout the house. If you can confidently determine that the shut off valve is faulty, you can replace it, but be sure to close off the water mains supply first.</p> <p class="MsoNormal"><strong>You can also seek specialist assistance</strong></p> <p class="MsoNormal">If you don’t want to risk causing further damage to your water pipes, or you attempt a DIY job only to discover the unwanted noises are persisting, a call to an experienced, licensed plumber might just be your best course of action. They will have the expertise and know how to get your pipes fixed with minimal hassle so you can enjoy a peaceful home once again.</p> <p class="MsoNormal"><em>This is a sponsored article produced in partnership with </em><a href="https://www.mremergency.com.au/" target="_blank" rel="noopener"><em>Mr Emergency</em></a><em>.</em></p> <p> </p>

Home Hints & Tips

Placeholder Content Image

11 home improvement projects you can do yourself instead of hiring a professional

<p><strong>There's no better time to DIY</strong></p> <p>There’s nothing quite as satisfying as a job well done – and these DIY projects will boost your handyman status. They are simple enough to do on your own without spending a lot of cash on tools and supplies. Fasten that tool belt and get started!</p> 
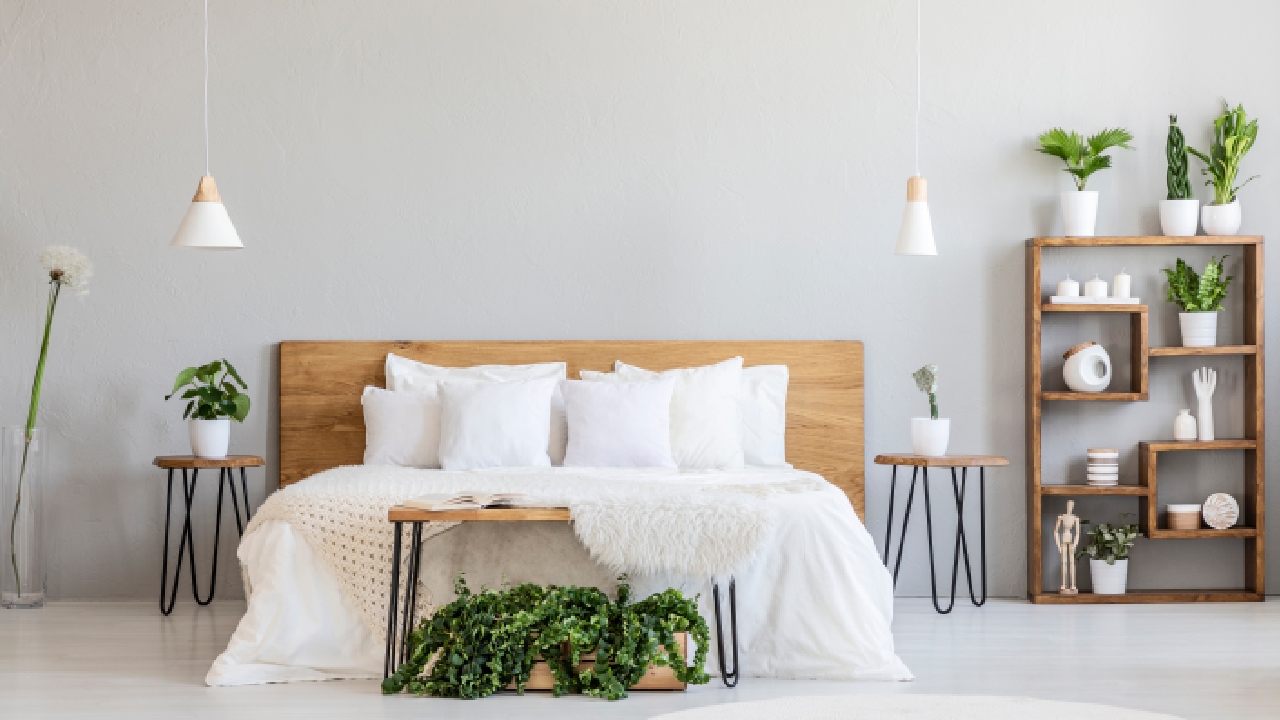
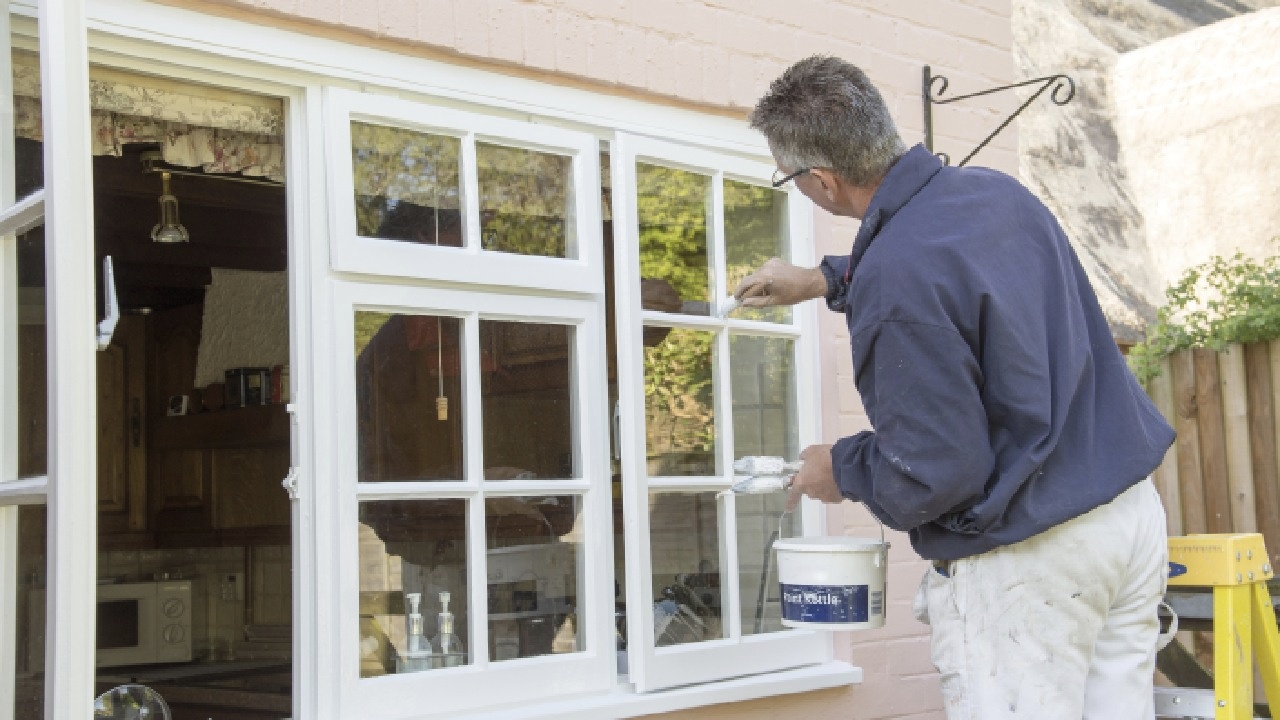
<p><strong>General painting</strong></p> <p>“Some DIY projects can be done by homeowners with a small investment in the right tools and a little patience. Painting is a great way to give your home a face lift, and it’s not difficult if you do some research and take your time,” says Newell Slade, general contractor. No one wants to paint a room twice, so paint like the pros and buy high quality rollers and paint and choose a paint that has a primer already in it to save time and money. “Painting can be fun and relaxing if you just let yourself take the time to do it right.”</p> <p><strong>Patch and prime</strong></p> <p>There’s plenty of thrifty painting tricks you can use, starting with prepping the wall for optimal coverage. You need a smooth surface for the walls to be blemish free. Even larger holes can easily be repaired with wall patch kits found at home improvement stores. The steps are quite simple and will give your new painted walls a beautiful, smooth finish. “Using a spackle knife, fill in each hole with lightweight putty and scrape the excess off the walls. Wait for the putty to dry and sand down the spot until it’s smooth. Then, prime and paint the repaired spots,” says J.B. Sassano, president of a home improvement franchise.</p> <p><strong>Peel-and-stick floor</strong></p> <p>Looking for an inexpensive home improvement that will make a big impact? It doesn’t get much easier than peel-and-stick flooring. “This specific tile is easier to work with and prevents adhesive from oozing through the cracks between the tiles. It can even be installed over concrete if the concrete is clean, smooth and dry,” says Monica Mangin, host of DIY series, The Weekender. If you’re feeling creative, it’s easy to create bold patterns or borders with different using a variety of patterns and colours.</p> <p><strong>Peel-and-stick panels</strong></p> <p>Panelled rooms are making a comeback. This time around, the trend is usually horizontal and installation doesn’t require a hammer and nails, even though the panels are made from wood. “Creating a wood accent wall offers a great way to add personality and texture to your space. You can customise your look by playing with thickness and pre-stained colours,” says Mangin. “Mixing and matching the colours and styles will provide an eye-catching piece that pop.”</p> <p><strong>Penny tile</strong></p> <p>A tired and worn splashback can be replaced in a day. “Penny tile is a really affordable option, especially when it comes in white, which is one of the more standard colours,” says Mangin. But you don’t necessarily have to buy more tiles to get the colours you want. Mangin says you can customise this DIY home improvement by using enamel paints to colour individual tiles and bake them in the oven to fully cure. “After the white sheets are up on the wall, decide which tiles you want to pop out and then just pop in your DIY coloured tile,” says Mangin. Plus, these tiles don’t require a tile cutter, just a utility knife to cut the mesh sheets to fit the area.</p> <p><strong>Fences</strong></p> <p>It’s been said that fences make good neighbours, but the price shock of hiring a pro seems worse than the dog next door who likes to do his business in your yard every morning. Whether you want privacy or need to replace a worn-out fence, it’s a project that Bryan Clayton, CEO of GreenPal says you can do if you remember to do two important things: get a survey done to identify the correct property lines, and mark for pipes if you have underground sprinklers. However, there are certain fences that are friendlier for a DIY home improvement. “Based on my experience the easier types of fencing to install are the black aluminium-based products made to look like wrought iron,” says Clayton. “However, for fencing styles such as chain link and solid vinyl panels, I would not recommend doing it yourself – there’s quite a bit of a learning curve associated with getting them just right.”</p> <p><strong>A lasting first impression</strong></p> <p>A faded, outdated, or squeaky door doesn’t make a good first impression and it may not provide much in the line of security or keeping out drafts. Luckily you can create a more welcoming entrance by replacing your old door with a new one. Exterior doors are available pre-hung in a weatherstripped frame so all you need are a few tools and basic carpentry tools to install it. Depending on your budget, you can choose from steel doors which require little maintenance, or fibreglass doors that require almost none. Going with steel or fibreglass can save you money over wood, and they won’t rot or warp; the more expensive ones look just like real wood.</p> <p><strong>Window screen</strong></p> <p>Using packing tape may be a quick remedy for a hole or tear in the screen, but it’s not a permanent fix. Small patch kits are sold at home improvement stores and a small hole can easily be repaired in just a few minutes with the patch and a hair dryer. Larger screen tears, like from your dog’s excitement over an online delivery, can be a DIY project too, as long as the frame is in good shape. The most popular replacement material for screens is fibreglass because of its flexibility. Since you’re replacing the screen anyway you may want to get the sun-shading fabric which blocks more sun and – bonus – is stronger than fibreglass and aluminium so it’s great for pets.</p> 
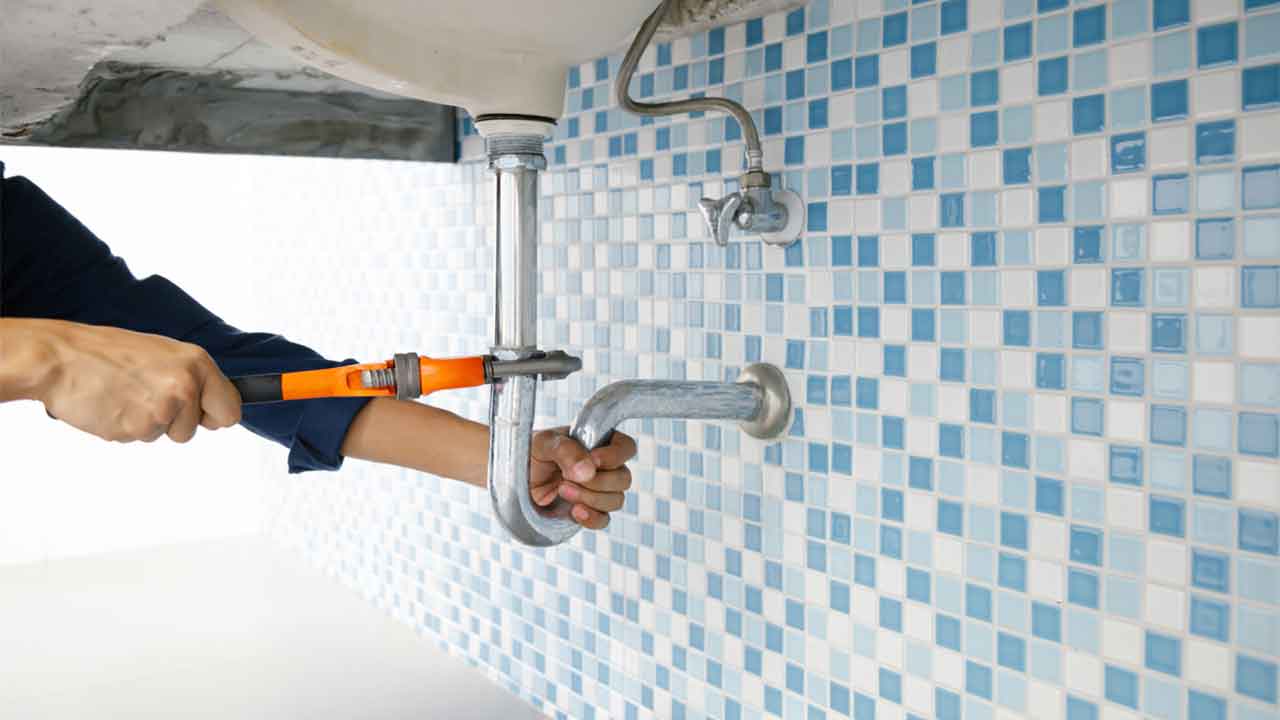
<p><strong>Light fixtures and plumbing fixtures</strong></p> <p>“As long as you familiarise yourself with the basics of proper safety procedures such as turning off electricity and water when working, these are DIY home improvements worth doing,” says Brian C. McHugh, owner of McHugh Construction. For lighting, the key is knowing how much space you have to house a new light fixture. For example, ceiling fans come in various blade sizes to suit the size of your room. If you’re replacing a bathroom tap, you’ll want to buy a tap that matches the existing holes in the sink. If you don’t feel confident in your DIY skills, though, it’s better to just do the choosing yourself and leave the installation to the professionals.</p> 
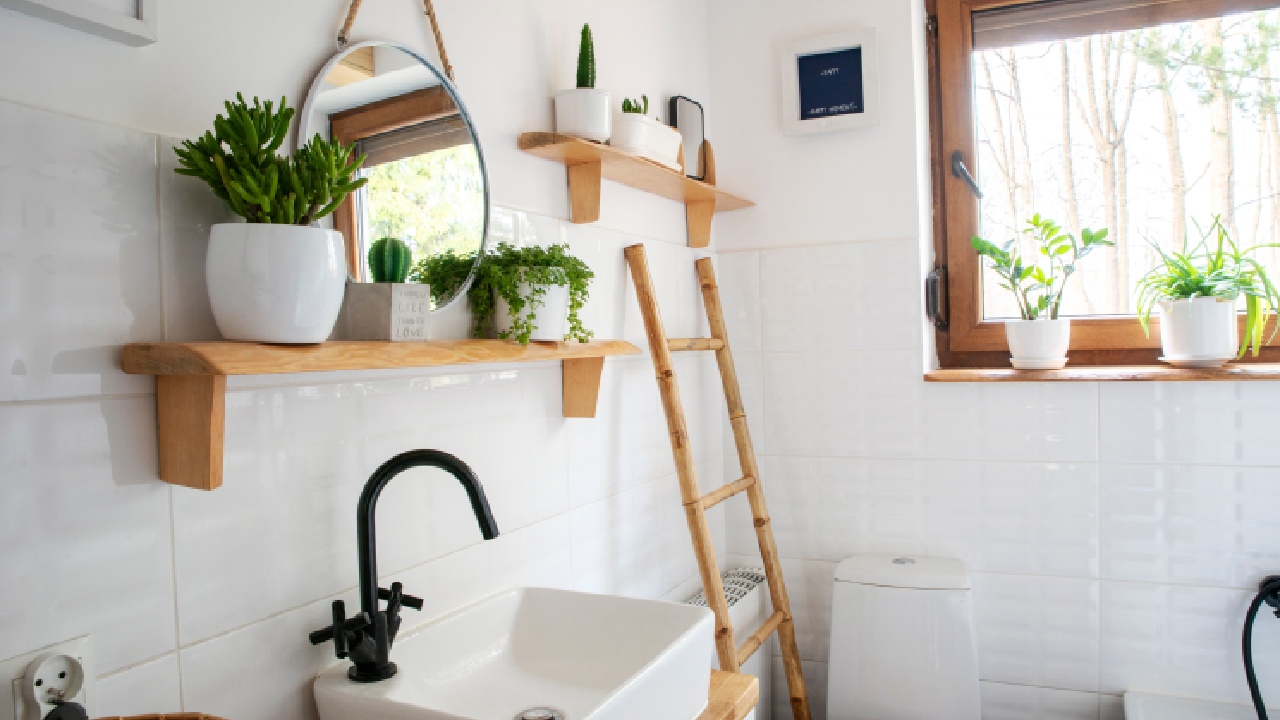
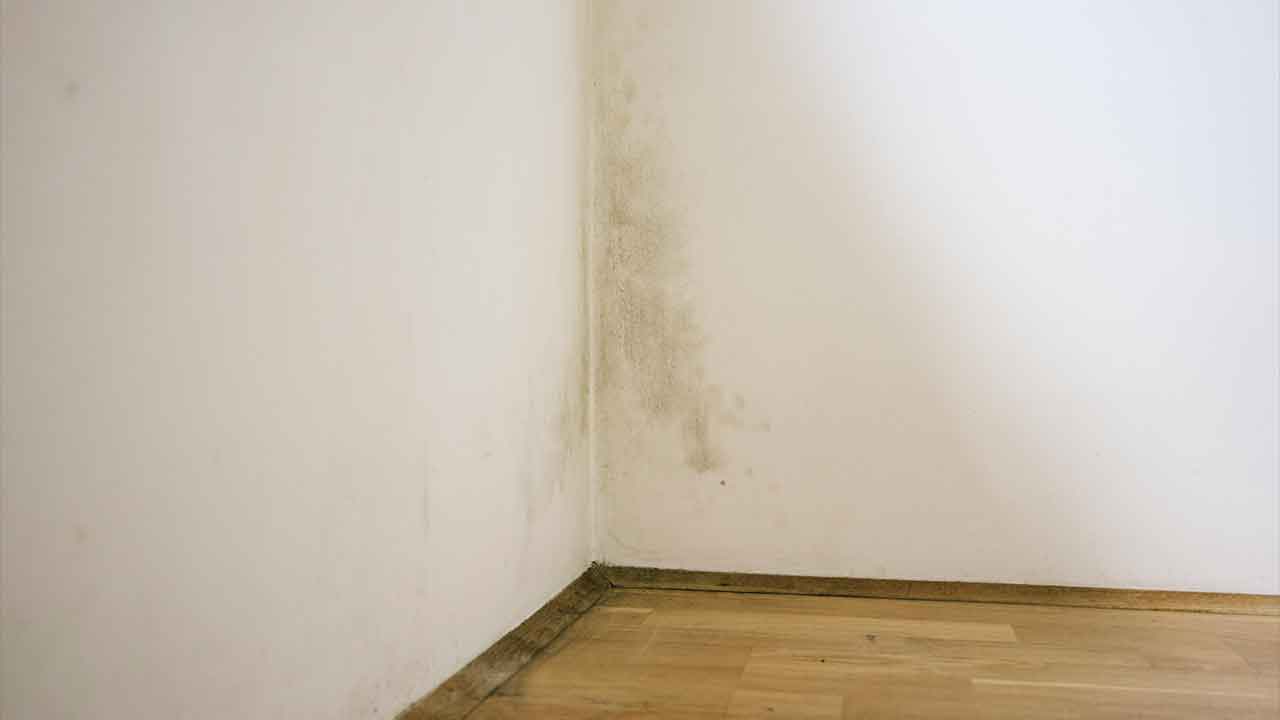
<p><strong>Caulk it up</strong></p> <p>Inspecting and repairing caulk is a project you should do yearly, according to Sassano. “Using caulk to seal cracks and gaps serves multiple purposes: It lowers heating and air conditioning bills by reducing air flow into and out of the home; it prevents moisture that can cause wood rot, mould, mildew and water damage, and it keeps insects and other pests out,” he says. The project will determine which type of caulk. For example, silicone is best for the bathtub and shower area. Start by removing the old caulk, cleaning the surface, and then apply new caulk. Caulk removal tools and solutions make the project even easier.</p> 
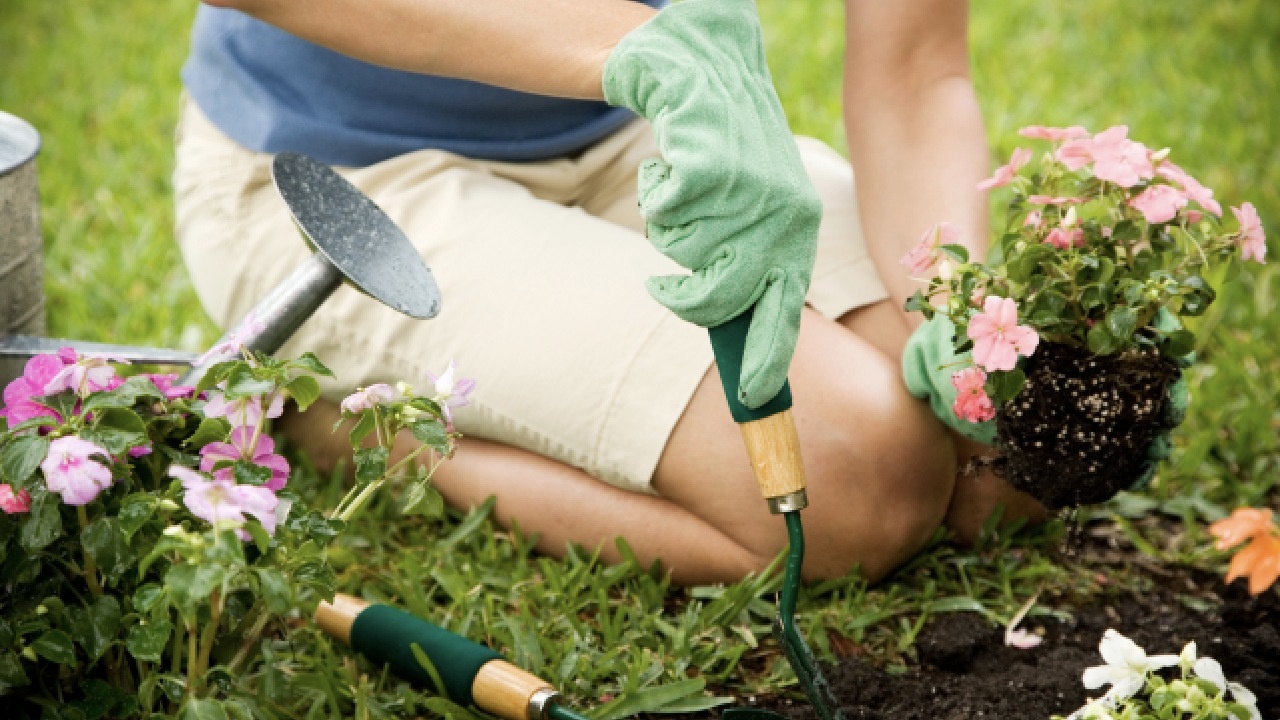
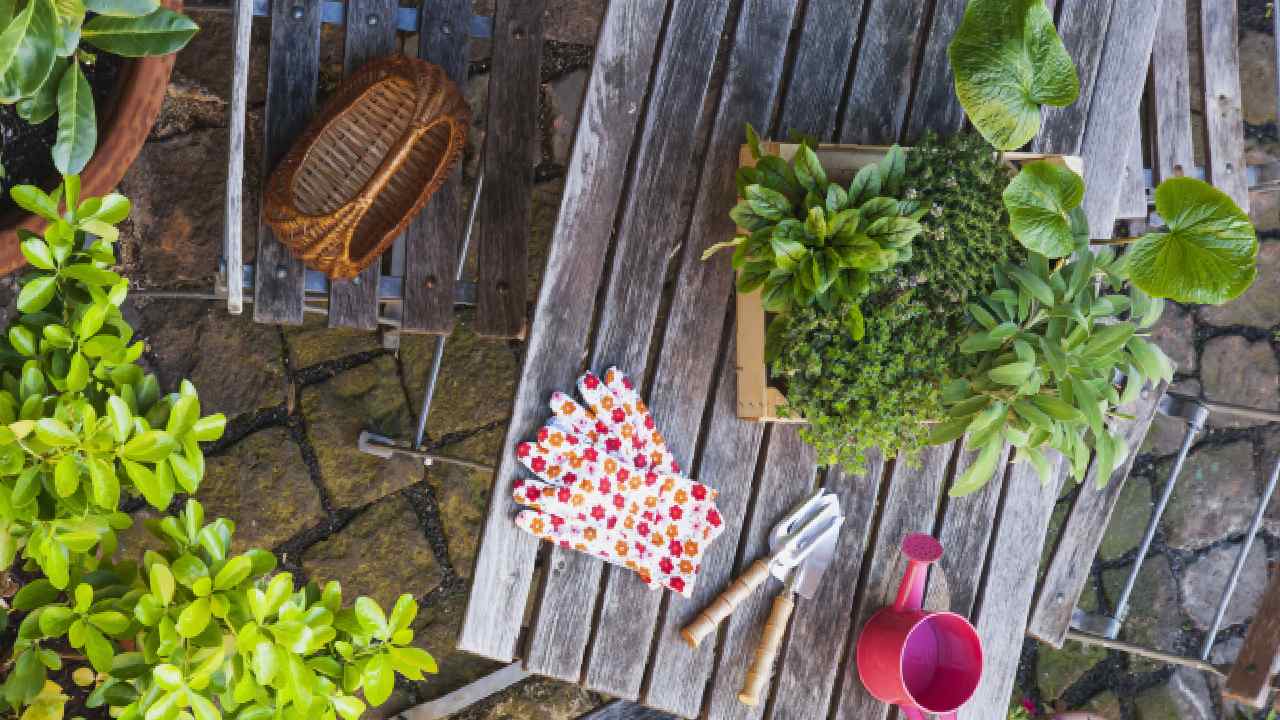
<p><strong>Landscaping</strong></p> <p>Creating a backyard oasis can be a great way to express your creativity. A raised garden bed, adding new paver stones, or creating a perennial flower garden involves more sweat equity than expertise. You can still get some help for the heavy lifting. “Ask your local landscape supply to deliver your materials instead of renting trucks or equipment,” says McHugh. “The tools for most jobs such as shovels, rakes and a wheelbarrow are things you probably already have in your garage.”</p> <p><em><span id="docs-internal-guid-44670a98-7fff-5184-42ee-20b15e18348f">Written by Lisa Marie Conklin. This article first appeared in <a href="https://www.readersdigest.com.au/food-home-garden/diy-projects/11-home-improvement-projects-you-can-do-yourself-instead-of-hiring-a-professional" target="_blank" rel="noopener">Reader’s Digest</a>. For more of what you love from the world’s best-loved magazine, <a href="http://readersdigest.innovations.com.au/c/readersdigestemailsubscribe?utm_source=over60&amp;utm_medium=articles&amp;utm_campaign=RDSUB&amp;keycode=WRA87V" target="_blank" rel="noopener">here’s our best subscription offer.</a></span></em></p> <p><em>Image: Getty Images</em></p>

Home Hints & Tips

Our Partners