Mother jailed after hiding her baby in a drawer for three years
<p>A mother from Chester in northern England who concealed her baby daughter in a bed drawer for the first three years of her life has been sentenced to seven years and six months in prison for what authorities described as an extreme case of child neglect.</p>
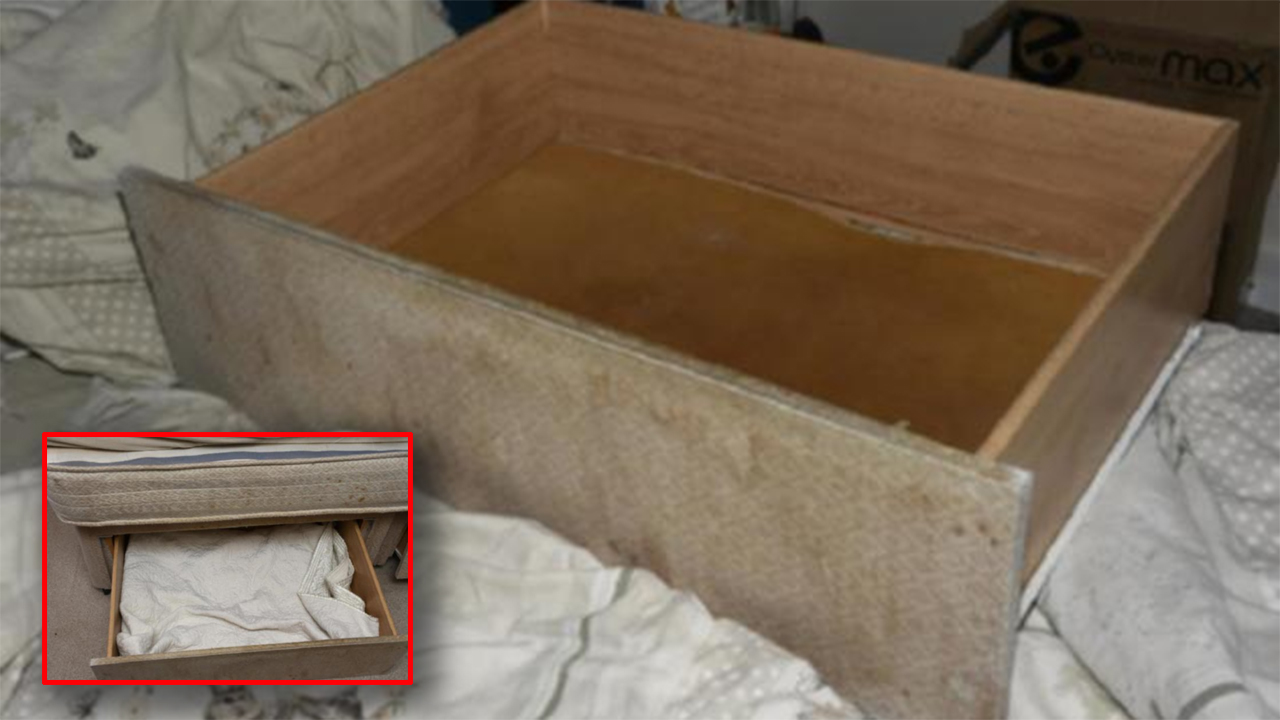
<p>The child, born in March 2020 in a bathtub, was kept secret from the outside world. She was unregistered, had never met another person besides her mother, and spent her formative years confined to a drawer under a bed.</p>
<p>“The child had spent much of its life hidden in a bedroom at the address, even sleeping in a drawer under the bed,” police said in a statement.</p>
<p>The neglect left the girl severely underdeveloped and malnourished, with untreated medical conditions, including a cleft palate. Authorities only discovered her plight in February 2023, when the mother’s partner heard unusual noises upstairs and found the malnourished child.</p>
<p>Social workers and police arrived shortly after, uncovering a scene described as shocking and heartbreaking. A social worker testified in court about finding the child rocking back and forth in the drawer, adding that the mother showed no remorse and treated the situation with indifference.</p>
<p>Investigations revealed the mother would occasionally feed the baby “milky Weetabix” with a syringe and change her nappy. “As time went on, the mother went to work and took her other children to school and left the child in the drawer, alone for hours on end,” the Crown Prosecution Service said. “The baby’s growth and physical and mental development was severely impacted by the lack of care, attention and food and the restrictions of a life spent in a drawer.”</p>
<p>By the time she was rescued, the nearly three-year-old child could not crawl, walk or talk. Her physical and mental development was likened to that of a 10-month-old. She suffered from dehydration, swollen limbs and poor muscle tone, conditions attributed to the extreme neglect.</p>
<p>The mother, who cannot be named for legal reasons, pleaded guilty in October to four charges of child cruelty spanning the girl’s life until her rescue. During sentencing at Chester Crown Court, prosecutors detailed the grim life the child endured, noting that she had never celebrated a birthday, Christmas or seen daylight.</p>
<p>“This child has never known the joy of a family celebration or simple acts of love,” said Senior Crown Prosecutor Rachel Worthington.</p>
<p>The court also heard that the mother claimed she was in an abusive relationship with the child’s father and hid the pregnancy out of fear.</p>
<p>Since being placed in care, the child has shown remarkable improvement but faces a long road ahead. She has started interacting with others and undergoing surgeries to address her cleft palate.</p>
<p>Detective Constable Rachel Di Nicola expressed hope for the child’s future while condemning the mother’s actions. “The shocking neglect was on an indescribable scale and the suffering the child experienced will impact them for the rest of their life,” she said.</p>
<p>“All those involved in the case have been left deeply shocked by what we uncovered, and we have all been amazed by the way the child has recovered since they were discovered, and we hope that this recovery continues.”</p>
<p><em>Images: Chester Crown Court</em></p>